Showing posts with label diy gifts. Show all posts

Wednesday, February 27, 2013

Before & After

BEFORE
 
AFTER
                                                   What do you think? I found this at the thrift store some time ago and just got around to giving it a make over.  I may have to add something else to the inside though. Seems like it could use a little somethin' somethin'. You can see the price on the front  $2.50.  A little paint, sanding, some stain, and I added a light  ( I already had the light ).  I think it turned out pretty cute. Give me some suggestions for the inside. Should I add more?  Have you done any make overs lately? Are you happy with how they turned out?


Sunday, October 28, 2012

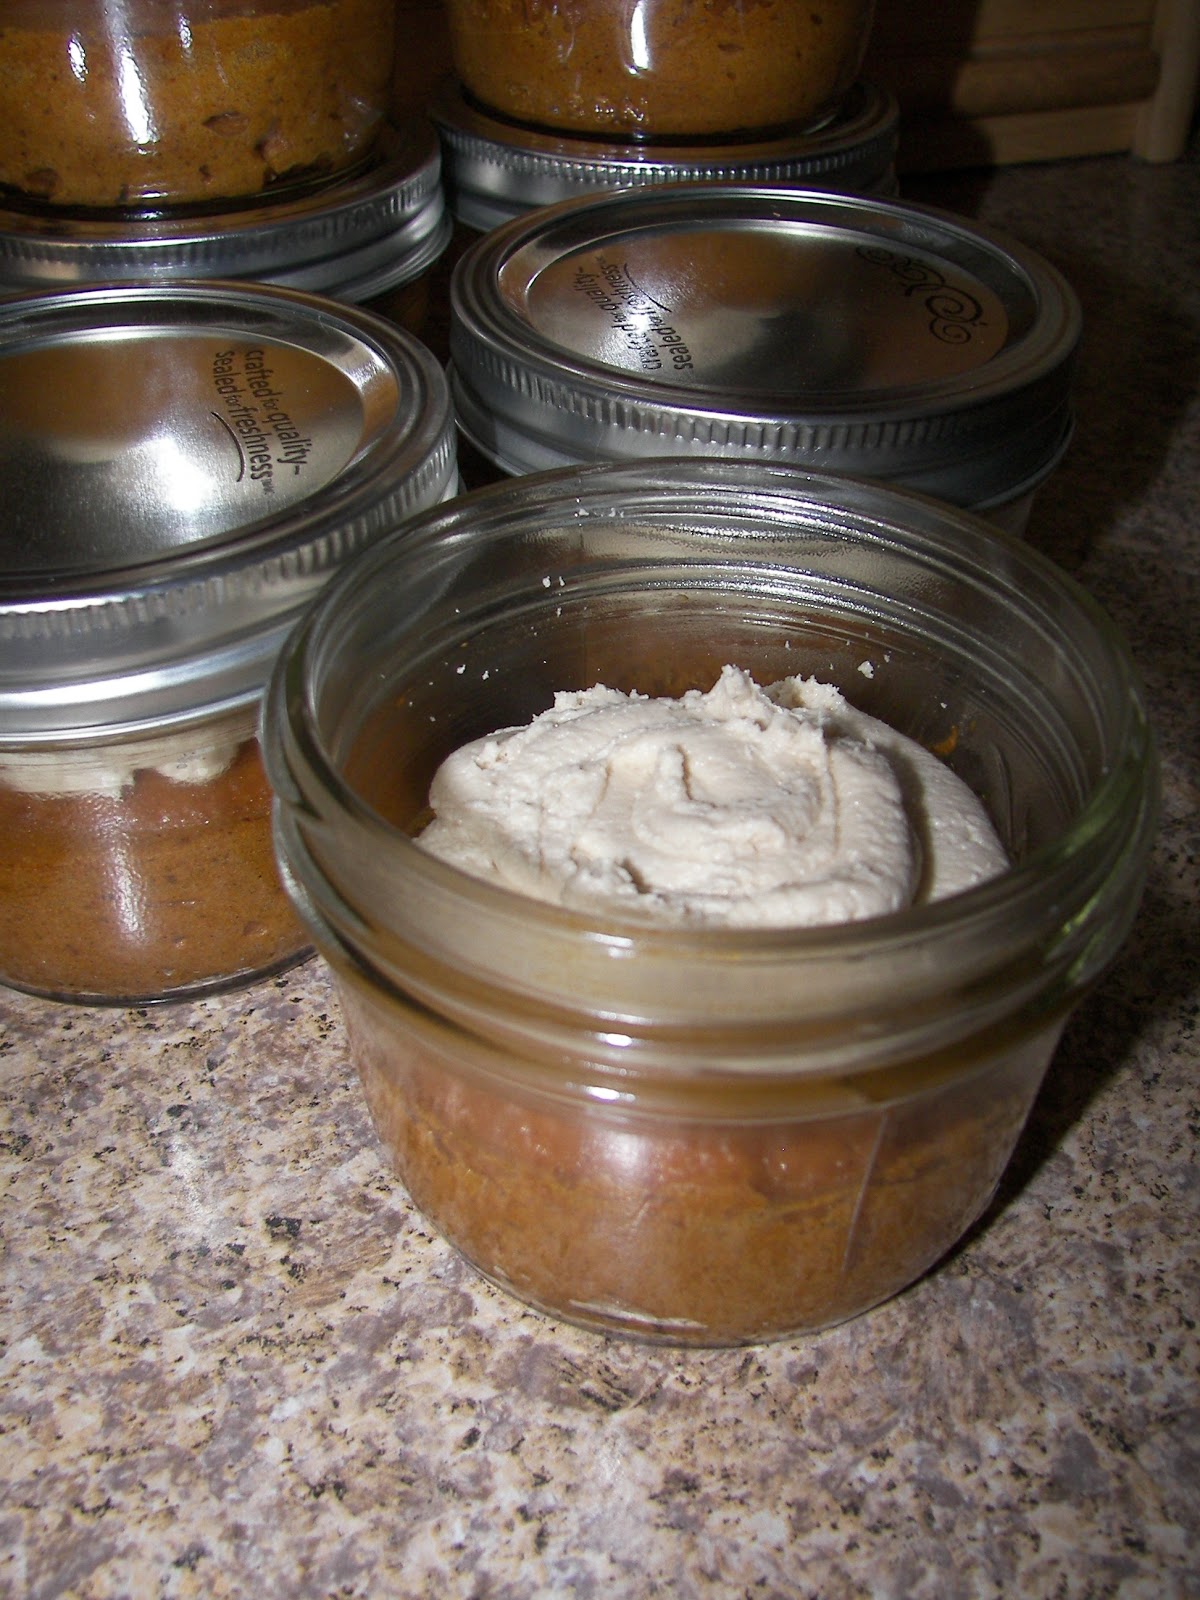
Pumpkin Jar Cakes...Cupcakes in a jar


I finally made some jar cakes or cupcakes in a jar. I just love the idea of individual versions of desserts. I think jar cupcakes are sooo cute. I have plans for some jar pies and jar cheesecakes too. These turned out way better than I imagined they would. You can use just about any cake recipe you want to, but with it being fall and all I had to go with something pumpkin.   Here's my recipe:

1 box of Spice cake mix  ( I used Duncan Hines )
1 box of instant pumpkin spice pudding
1 can 100% pumpkin ( I used Libby's )
2 eggs
1/3 C of oil ( veg. oil )

 Preheat oven to 350 degrees. Mix all ingredients together well. Fill jars 1/3 full. Too full and not enough room for icing. Bake for about 24 minutes. I only had 12 jars to use so I had extra batter that I mixed with oatmeal and made cookies. ( Baked 350 for about 12 minutes). The cookies were not as good as the cakes. I need more jars!

I made my own maple icing for the cakes.

2 1/2 cups powdered sugar
1 stick butter
1 teaspoon maple flavoring


Add sugar and butter to mixing bowl and mix for about 5 minutes then add maple flavoring , mix another minute then it's done. I would recommend doubling the ingredients for more icing. Lots of icing is always good.


If you fill the jars too full with batter you might not have enough room for icing. Although they would still be good, everything is better with icing! I think they turned out pretty cute. Not to mention yummy. These would make really cute little gifts for teachers, neighbors, or family.


Mine could have used a little more icing.  Try some and let me know how yours turn out.
Have a sweet day!

Saturday, December 17, 2011

Pretty light up present!


Well, it's been snowing all day here in N.E. Ohio. There's about 1 inch out there. The Boy is very happy. Yesterday was his last day of school until Jan.3! I am pretty excited about that, too. We gave all the presents to his teachers, they seemed to go over very well. I really had fun making them. I hope you are having fun making some gifts, too. So I'm sharing another how to today. These are very easy, I had to start simple so I can get the hang of this stuff. It is actually more for my benefit, really. Anyway, I think my little lighted gift turned out pretty cute. I had to take the dark picture in the bathroom, it was the darkest place I could find. I hope the pictures do it some justice.


I started out with the box. I spray painted it red and after it fully dried ( as in I got side tracked and finished it 4 days after I painted it ) I poked a hole in the back with a screw driver. I then carefully inserted a small set of lights through the newly poked hole. I put some ribbon around it, and then finished up with a homemade bow. Not sure if I am 100% happy with the ribbon I chose, but it will do for now. Again very simple and yet Pretty ( Insert Ahhhhs here ). I have made similiar ones before, the hardware cloth, material covered boxes with lights in them. I really like those, this was much easier. I had everything on hand, so again easy. Look for these kinds of boxes while thrifting, they are usually around. Let me know what you think. Maybe try one.


I am trying to make something with a snowman next. We'll see how that turns out. I am off to re-hang the snowflakes we hung all around the house from the ceiling. The little boogers keep falling. Just since I started this post about 3 of them have fallen. I need stronger tape! I will post pictures of them one of these days. I really need to work on some stuff for etsy. I might just wait until after Christmas. Still kicking around cupcake wreath ideas.


Be well,


Barb


Sunday, December 11, 2011

Pictures from yesterday's post


I think the directions were pretty easy. It seems blogger is a bit different these past few days. Maybe it's just me. I couldn't figure out how to add mutiple pictures to my post yesterday. I meant to get back on and add the pictures last night, but we had a Christmas party to go to so I sort of forgot. OOPS. Had a lot of fun at the party though. Hope you try this. The possibilities are endless.

Be well,


Barb


Saturday, December 10, 2011

Some DIY gifts


At this time of year there are many gift giving opportunities. We always like to show our appreciation for The Boy's ( my son ) teachers. This means a few extra gifts. He has 3 reagular teachers he sees every day, 3 specials ( art music gym ) teachers, 1 gifted class teacher, a principal, and 1 very special school secretary. This can add up quick, so we try to keep the gifts small. So this is where the diy in me steps in. Here are a few gifts I made for them. I think that the pictures are pretty self explanitory(sp). The first picture shows the almost finished projects. I am going to fill these jars with candy. I was trying to find some candy that is wrapped in black wrappers to show through the Mickey outline, not having much luck so far, any suggestions?


Having some picture issues at the moment.


supply list


Jar


contact paper


frosted spray paint


outline image


ribbon of choice


Start with a clean jar. Decide what image you would like your "window" to be. Trace the image onto the contact paper. Cut out the image and firmly place it on the jar where you want it.


Spray the jar with the frosted paint. After waiting the appropriate drying time, which varies per manufacturer, carefully peel off the contact paper. I let mine dry for 24 hours after removing contact paper before I tied the ribbon on. I think they came out pretty cute. Next i will fill them with some candy and there you go. I had everything here on hand so it that was even better. let's see if my pictures will post now. Tell me what you think of this project. Easy and fun!